RC cars are indeed fascinating, and that’s got a lot to do with how endearing cars are in our lives. Designing an RC car is a dream to many.
For someone getting in to Robotics, an RC car is usually the first real project that is a challenge to pull off. This is because although it looks simple, it incorporates a lot of sub-systems like Wireless Radio Control, Motor control, Independent Power system etc.
In a way, an RC Car should be your first Robotics project. A project such as this will give you a good idea on various systems that you need to integrate and will leave you better off at the end of it.
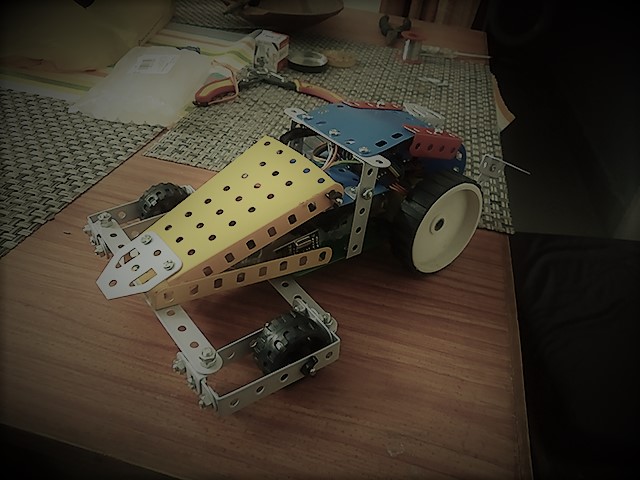
Let me take you through a simple RC car that I hacked together overnight with some parts that I had lying around in my house. This RC car is completely self contained. It has its own Li-ion battery pack with in-built charging circuits. All you need is a USB charger to recharge the Li-ion cells.
Major Components
Put simply, any RC car will have more or less the following main sub assemblies. When you are designing your RC car, you too will see that you will have more or less the same parts.
- The Car Body
- A microcontroller (like an Arduino Nano)
- Geared DC Motors for driving the wheels
- L298 H-bridge Motor Driver for bi-directional control of the motors
- Servo Motor to operate the steering linkages
- Radio Control IC for wireless communication between the transmitter and the RC Car (like nRF24L01)
- Battery for power (18650 Cells with TP4056 for charging)
- LED for showing status of the car (or you could do fancy stuff like headlights and turn lights, use your imagination, go wild)
The Basics
Let’s get down to basics. What do you need first to make a car? The body and the wheels of course.
Mechanix Set: The body of the car can be made with any plastic toy car. However, I’ve used a Mechanix toy set to build the chassis of the RC Car.
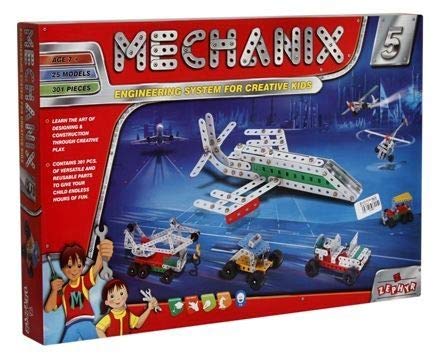
I really like to use the Mechanix set for robotics. You are limited only by your imagination in what you can make with it. Here’s a link to one of the products on Amazon. (I’m in no way affiliated to it, just sharing a link so that you can find it easily)
I digress a little. I checked online and found that the Mechanix set is an Indian copy of the British Meccano set. Here’s a video of James May exploring a bit of Meccano culture.
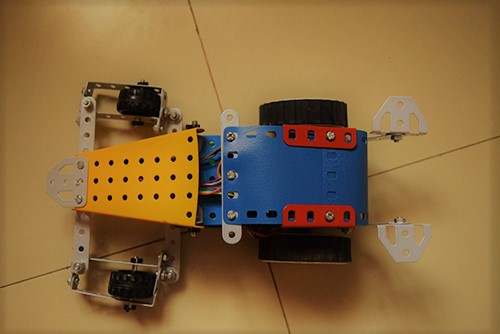
As you can see from the photograph, I have used the toy set to make almost all of the RC car body. The set also comes with wheels which I have used for the front wheels. The rear wheels are driven by two geared motors. I’ll show you where you can buy them too at the end.
The Guts
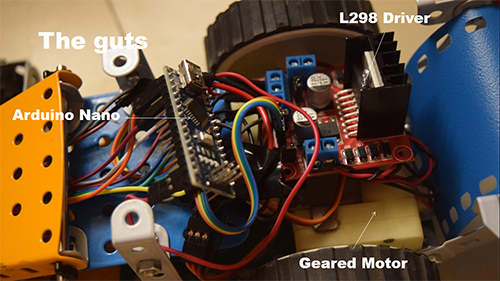
The rear wheels of the RC car are driven by two geared DC motors. Since microcontrollers cannot provide enough current to drive motors, we have to use a motor driver IC to do the heavy lifting. Here you can see that I’ve used the commonly available L298 breakout board (yeah, I know it’s overkill for this project, but this was an overnight hack you see).
The Arduino Nano is the brain of sorts, taking in signals from the radio receiver and controlling the motors via the motor driver.
So, where’s everything getting the power from?
The Power System

I’ve used two 18650 Lithium-ion cells in series to drive the entire RC Car. Each 18650 cell is rated for about 3.7+ Volts, and 2 in series should give me around 7.2 V during most of their discharge cycle. More than enough juice to drive 2 geared DC motors.
TP4056 is a commonly used charge-protection IC for Li-ion cells. Here, I’ve used one each for both the 18650 cells. So, to charge the cells, I plug in 2 separate USB chargers to the TP4056 ICs. They not only help in charging the cells by cutting off the charger when their cell voltage reaches 4.2 V, they also cut off discharge when the cell voltage drops below 2.9 V. Pretty neat.
The Steering is via a Servo Motor that tilts the front wheels. Quite a basic setup I’ve here.
Radio Control? Where’s that?
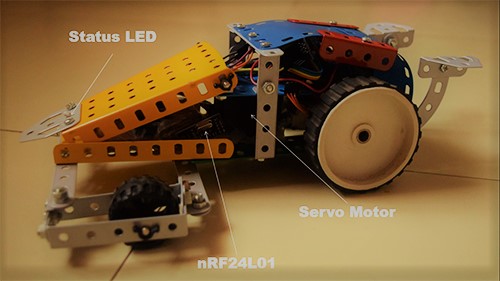
Remote control of the car is through a nRF24L01 setup. These are low power, low range 2-way communication chips operating in the 2.4GHz band with SPI interface (SPI takes up 5 pins on the Arduino, unlike I2C which makes do with just 2). This setup uses only 1-way communication since the car doesn’t transmit anything back to the controller.
The Radio Controller constantly sends data packets to the RC car. Each packet consists of 4 bits of payload. Each bit corresponds to the position of 4 buttons on the Radio Controller (Front / Back and Left / Right).
So, as long as the transmitter is in range of the RC Car, the car knows what buttons are pressed on the controller and understands whether to drive the DC motors forward or backward and knows how to position the servo motor for steering the car. It’s quite simple when you get down to it.
Anybody there?
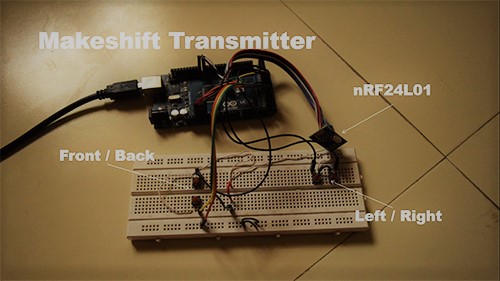
This is the definition of a “Hack”. I just didn’t have the time to make a proper controller, just got hold of another Arduino, a breadboard, 4 push buttons and an nRF24L01. Boom, a Radio Controller!
Yeah, I know, the controller needs quite a bit of work. But this was just a proof of concept kind of project. I had this undying urge to make something, and this is what I came up with one night.
Where can you buy the parts?
As a disclaimer, I am not affiliated to any of the following out-going links. They are provided as is and I make no claims thereof. I’m just linking them to give you a head start.
- Arduino Nano – Link
- L298 Motor Driver – Link
- 18650 Li-ion Cell – Link
- TP4056 Li-ion Charge-Protection IC – Link
- nRF24L01 Radio Control IC – Link
- Geared DC Motor with Wheel – Link
- Mechanix Set – Link
Please let me know if you find any broken links.
Closing words
I’m sure you must be thinking that you can improve on this. Please do let me know how your overnight RC car looks like. If you have any comments or questions, please let me know. Cheers!